Lecture 4 — Turtle Positioning & Direction
Lecture 4 — Turtle Positioning & Direction⌗
Instructor: Laksh Budhrani
Review / Recap⌗
Basic Commands from Previous Lectures⌗
| Command | Meaning (Simple) |
|---|---|
p.forward(steps) | Move the turtle straight ahead |
p.backward(steps) | Move the turtle straight backward |
p.left(angle) | Turn the turtle left |
p.right(angle) | Turn the turtle right |
p.penup() | Move without drawing |
p.pendown() | Start drawing again |
p.pencolor(color) | Change the pen color |
p.pensize(size) | Change the line thickness |
p.hideturtle() | Hide the turtle icon |
p.showturtle() | Show the turtle icon again |
Canvas Coordinates & Directions⌗
Canvas Reference Image⌗
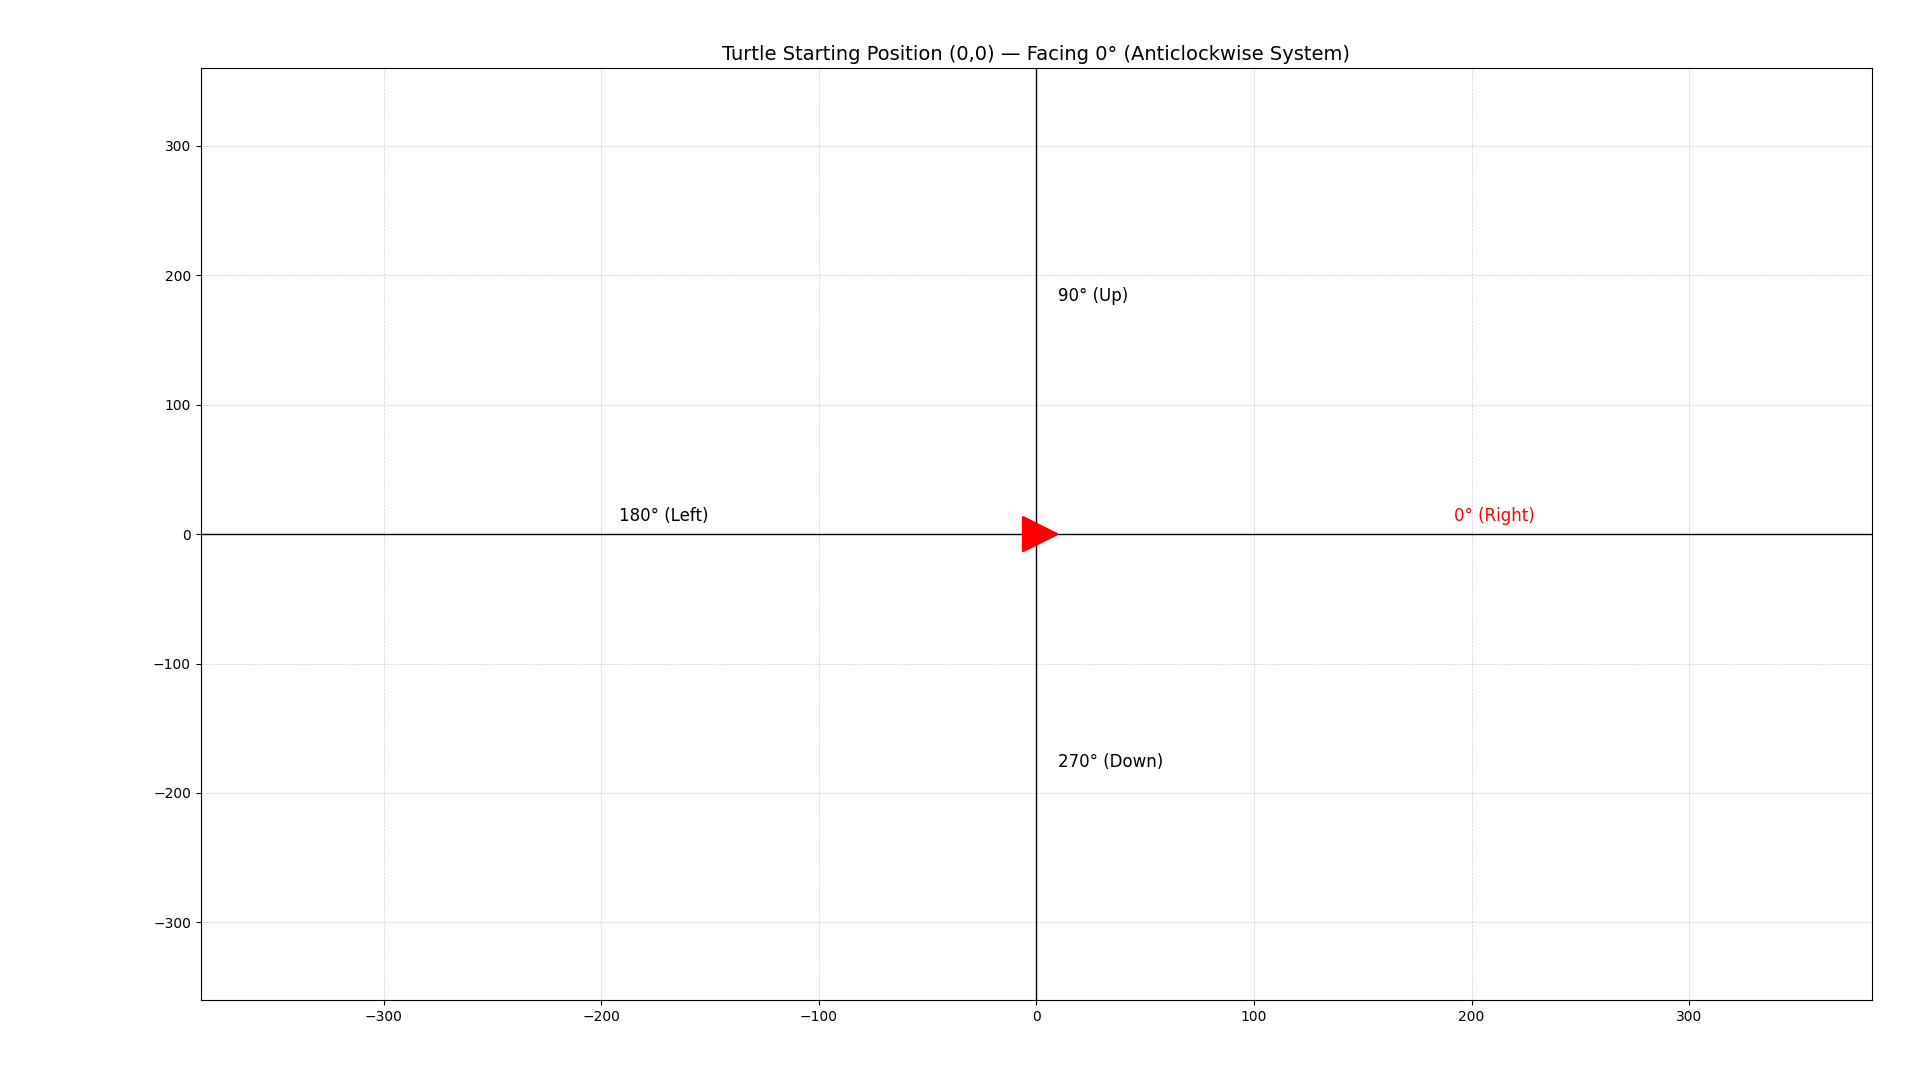
The turtle screen works like a graphing plane:
- Center → (0, 0)
- Right → positive X
- Left → negative X
- Up → positive Y
- Down → negative Y
This helps us understand where the turtle will “teleport” when using goto(x, y).
It also shows how setheading(angle) works:
0°→ face right90°→ face up180°→ face left270°→ face down
These angles help us point the turtle in exact directions before drawing.
Objectives⌗
- Learn how to teleport the turtle using
goto(x, y) - Learn how to point the turtle using
setheading(angle)
Objective 1 — goto(x, y)⌗
Simple Definition⌗
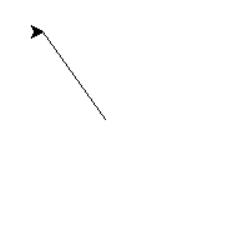
goto(x, y)— Move the turtle instantly to a specific coordinate.
Example: Move to Top‑Left Corner⌗
p.goto(-200, 150)
Objective 2 — setheading(angle)⌗
Simple Definition⌗
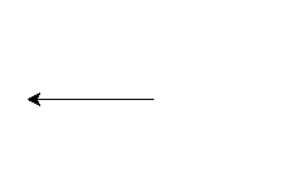
setheading(angle)— Point the turtle in a specific direction using degrees.
Example: Face West and Draw⌗
p.setheading(180)
p.forward(100)
Clock Drawing Activity (Guided)⌗
Create a new Python file in VS Code named:turtle_class4.py
Clock Image⌗
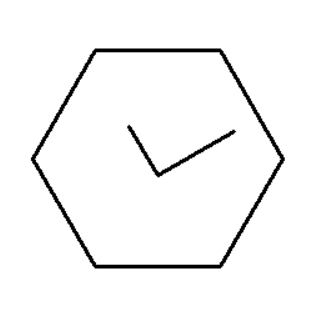
Explain in Plain English⌗
Write a short explanation (3–5 sentences) describing how you think we can draw this clock using:
goto(x, y)setheading(angle)penup()pendown()right()forward()
Explain the steps in simple English, as if you are telling a friend how to draw it.
Boilerplate Code⌗
import turtle as trtl

p = trtl.Turtle()
p.speed(0)

# --- ENTER YOUR CODE HERE ---
# (Use goto() and setheading() to place each clock line)


# --------------------------------------------------------------
# (Stop writing code above this line)

wn = trtl.Screen()
wn.mainloop()
Notes⌗
- Use
goto()to place each hour mark. - Use
setheading()to point the turtle outward before drawing each line. - Use
penup()to move without drawing. - Use
pendown()to draw the hour marks. - Use
hideturtle()at the end for a clean final look.
Independent Activity — Pine Tree Drawing⌗
Pine Tree Image⌗
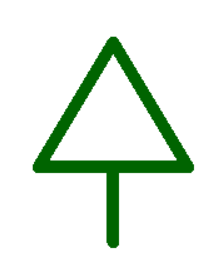
Your Task⌗
Look at the image above and draw it independently using:
goto(x, y)setheading(angle)forward(distance)penup()pendown()pensize()pencolor()
Use the Turtle boilerplate code provided earlier in this lecture.
Important Coordinates (Use These!)⌗
To help you draw the pine tree, use these exact coordinates:
- Top of triangle →
goto(0, 80) - Bottom‑right →
goto(60, -20) - Bottom‑left →
goto(-60, -20) - Trunk start →
goto(0, -20)
These points will help you draw the triangle and trunk in the correct place.
Create Your Own File⌗
Create a new Python file in VS Code named:
turtle_class4_independent.py
Inside that file, use the boilerplate and write your pine‑tree code in the section marked:
# --- ENTER YOUR CODE HERE ---
Submission Instructions⌗
Submit your work in Google Classroom by:
- Creating a Google Doc
- Pasting your code into the document
- Adding a screenshot of the output window showing your drawing
- Turn in the Google Doc to the assignment titled In‑Class Exercise 4