Lecture 13 — Advanced Controls & Submission: Number, Range, Buttons & Action
Lecture 13 — Advanced Controls & Submission: Number, Range, Buttons & Action⌗
Instructor: Laksh Budhrani
Quick Recall: Lectures 9–12 Review⌗
Before we learn how to send our form data to a server, let’s review all the tags and attributes we’ve mastered so far in our forms unit!
| Tag / Attribute | Type | Purpose | Example |
|---|---|---|---|
<form> | Paired Tag | Main wrapper container for all form controls | <form>...</form> |
<label> | Paired Tag | Displays text labeling a specific input field | <label>Name:</label> |
<input> | Unpaired Tag | Creates an interactive input field | <input type="text"> |
type="text" | Attribute Value | Creates a standard single-line text box | <input type="text"> |
type="email" | Attribute Value | Creates an input box tuned for email addresses | <input type="email"> |
type="password" | Attribute Value | Creates a masked text box that hides typed characters | <input type="password"> |
type="radio" | Attribute Value | Single-choice round button | <input type="radio"> |
type="checkbox" | Attribute Value | Multi-choice square box | <input type="checkbox"> |
type="date" | Attribute Value | Calendar date selector | <input type="date"> |
type="time" | Attribute Value | Clock time selector | <input type="time"> |
type="color" | Attribute Value | Native visual color palette picker | <input type="color"> |
type="file" | Attribute Value | File upload selector button | <input type="file"> |
name="..." | Attribute | Groups controls & labels column header for saved data | name="user_name" |
value="..." | Attribute | Text stored or pre-filled inside the control | value="Freshman" |
<select> | Paired Tag | Main wrapper container for a dropdown menu | <select name="city"> |
<option> | Paired Tag | Defines a single selectable choice inside a dropdown | <option value="sc">SC</option> |
<textarea> | Paired Tag | Creates a multi-line text input box for long text | <textarea name="bio"></textarea> |
rows="..." | Attribute | Sets the height of a text area in lines | rows="4" |
cols="..." | Attribute | Sets the width of a text area in characters | cols="30" |
Class Check-In: Does anyone have questions about text inputs, choice controls, dropdowns, textareas, or specialized inputs before we learn how to collect numeric data and submit our forms?
The Story Continues…⌗

Sahil’s Week 13 Update!
Sahil is adding the final touches to his study group portal on
sahil_day13.html:
- He wants classmates to specify how many hours per week they can study and rate their confidence level in Web Design.
- He needs a Submit button so classmates can send their completed form.
- He needs a Reset button so classmates can clear the form and start over if they make a mistake.
Let’s help Sahil add numeric inputs, sliders, and submission buttons to complete his form!
Sahil’s Request for Today⌗
“Hey! I want users to set study hours with number spin buttons, pick confidence levels using a smooth slider, and actually click SUBMIT to send their answers!”
“Here is what I need you to help me build in
sahil_day13.html:”
- Numeric Inputs & Sliders: Collect structured numeric data with
type="number"andtype="range".- Range Boundaries: Enforce rules using
min,max, andstepattributes.- Form Destination: Use the
actionattribute on the<form>tag to send data to a backend location.- Submission Buttons: Add
type="submit"andtype="reset"buttons.
Objectives⌗
- Create number input fields using
<input type="number">. - Create slider controls using
<input type="range">. - Restrict numeric inputs using
min,max, andstepattributes. - Set up form submission destinations using the
actionattribute. - Create action buttons using
type="submit"andtype="reset".
How Form Submission Works (Client-Server Architecture)⌗
When a user fills out a web form, the browser acts as the Client. When they click Submit, the browser packages all input data and sends it across the internet to a Server.
[ CLIENT (Browser) ]   --- Submits Form Data --->   [ SERVER (Backend) ]
  (User fills form)                                 (Saves data in database table)
The action Attribute⌗
The action attribute on the <form> tag tells the browser where to send the form data on the server:
<form action="https://example.com/submit_form">
When submitted, the server stores each field’s name and value into a database table:
user_name | study_hours | confidence |
|---|---|---|
| Sahil | 5 | 80 |
Objective 1 — Number Inputs (type="number")⌗
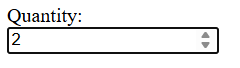
The number input type creates a text box optimized for typing numbers, complete with up/down spinner buttons.
<label>Quantity:</label><br>
<input type="number" name="item_quantity">
Objective 2 & 3 — Range Sliders & Boundaries (type="range", min, max, step)⌗
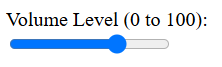
Use type="range" to create a visual horizontal slider bar. Control its minimum, maximum, and step intervals using min, max, and step.
<label>Volume Level (0 to 100):</label><br>
<input type="range" name="volume_level" min="0" max="100" step="5">
Important Rule: The
stepattribute controls how much the value increases or decreases with each movement along the slider or spinner!
Objective 4 & 5 — Submit & Reset Buttons (type="submit", type="reset")⌗
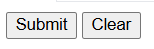
The submit button triggers the form’s action to send data to the backend, while the reset button restores all fields back to their initial empty or default values.
<input type="submit" value="Submit Application">
<input type="reset" value="Clear Form">
Guided Activity — Building Sahil’s Submission Form⌗
PART 1 — Project Setup⌗
- Open VS Code.
- Go to File → Open Folder and select your
Sahil_Projectfolder. - Create a new file named:
sahil_day13.html.
PART 2 — Expected Browser Output⌗
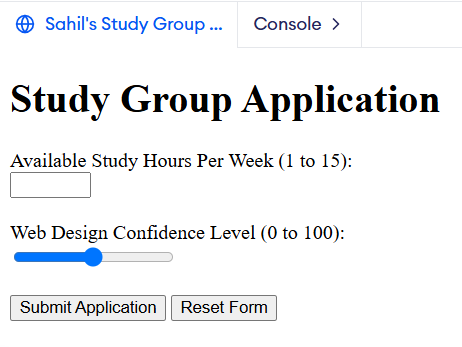
Here is what Sahil’s completed form will look like once we write the HTML together:
PART 3 — Starter Code (We will write the content together live!)⌗
Paste this starter boilerplate into sahil_day13.html. We will fill in the <body> together in class!
<!DOCTYPE html>
<html>

<head>
    <title>Sahil's Study Group Signup</title>
</head>

<body>
	<!-- START WRITING HERE -->


	<!-- STOP WRITING HERE -->
</body>

</html>
Independent Activity — Portfolio Rating & Contact Page!⌗
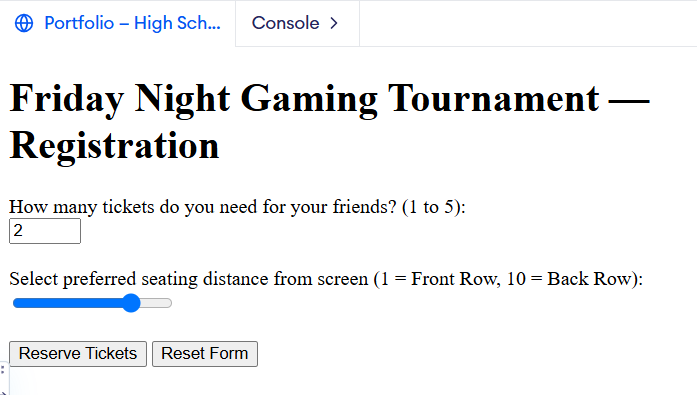
Now it’s your turn! Add a rating or feedback submission page to your portfolio site using numeric controls and form submission buttons.
Instructions:⌗
- Open your
Portfoliofolder in VS Code. - Create a new file named
portfolio_day13.html. - Copy the starter template above into your file and build your page using
<form action="...">, number inputs, range sliders, and submit/reset buttons.
Your Portfolio Prompt⌗
Your page must include the following 5 requirements:
- Form Action: Set up 1 main
<form>container with anactionattribute pointing to a submit URL. - Number Input: Include at least 1 number input with
minandmaxattributes. - Range Slider: Include at least 1 range input with
min,max, andstepattributes. - Submit Button: Include a
type="submit"button to send form data. - Reset Button: Include a
type="reset"button to clear input fields.
Example Solution⌗
Submission Instructions⌗
Submit your work in Google Classroom under In‑Class Exercise 13 by:
- Opening your Google Doc from previous lectures.
- Pasting your HTML code from both
sahil_day13.htmlandportfolio_day13.html. - Adding screenshots of both rendered pages from your browser.
- Turning in the document!
Summary: New Tags & Attributes Learned Today⌗
| Control / Attribute | Type | Purpose | Code Example |
|---|---|---|---|
type="number" | Attribute Value | Text box optimized for numeric input | <input type="number"> |
type="range" | Attribute Value | Visual slider bar control | <input type="range"> |
min="..." / max="..." | Attribute | Sets minimum and maximum allowed numeric bounds | min="1" max="10" |
step="..." | Attribute | Sets increment/decrement interval size | step="5" |
action="..." | Attribute | Specifies server URL destination for form submission | <form action="/submit"> |
type="submit" | Attribute Value | Button that sends form data to the server | <input type="submit"> |
type="reset" | Attribute Value | Button that clears all inputs back to default | <input type="reset"> |